Posts

Image
ANZOVIN FACE STUDIO I really like this style of face animation. It is more definable than preset blend shapes. http://www.anzovin.com/products/tfm1mayaFeatures.html
Image
SOFT MOD FACE RIG TUTORIAL I came across an old method of face rigging that I still think is kinda cool. All the riggers these days use clusters with painted weights but I thought I'd put the Soft Mod tool to use instead... http://www.cronimation.com/SoftFace.html
Image
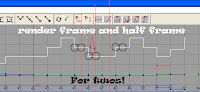
Cronin's 12 FPS animation method Well I wanted to come up with a way to animate within Maya on twos (every frame holds for 2 frames) then render out properly at 24 FPS without having to key every pose twice. I suppose one could animate at 24 fps and key every second frame twice. I decided to animate in Maya at 12 fps and set the render settings to render out twice as many frames, each keyframe duplicated. All done at render time. And here's how to do it. 1. In your preferences set the maya scene to 12 FPS. 2. In your globals set the 'by frame' to 0.5 - this will render sub frames inbetween (twice as many) i.e. frame 1, 1.5, 2, 2.5 .Maya will name the sequence properly. 3. For the subframes to be duplicates of the keys, they need to be the same values as the keys before them. Every frame needs a keyframe and every curve has to be stepped. This means we have to bake the animation curves and set them all to stepped before rendering. 4. Handy little MEL script to do that?....
CHARACTER MAP Well...not really a Maya trick but hey ...just learned this via google. Ever need those fancy characters in your text like ¢ ß Ć ® § Đ Well they are all accessible in windows character mapper. start menu/all programs/accessories/system tools/charater map Useful for photoshop text or Maya bevel text.
Image
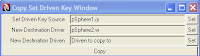
Attr & SDK COPY/PASTINGZ Some lovely tools in Maya's included bonus tools that allow quick and easy duplicating of attributes and driven keys. Under the animation tab we have 'replicate attribute' for all of those cool attributes you add to your rig. Simply select the object that you want to paste to, shift select the object and attribute channel of the object that has the custom attribute and hit 'replicate attribute'. Done. For set driven key transferring, a dialogue box pops up with 3 input boxes. 1. Set Driven Key Source - the channel that is being driven on the completed object (i.e. pSphere1.rY). 2. New Destination Driver - The driver object channel/attribute of the incomplete object. (i.e. pSphere2.bender) 3. New Destination Driven - The driven channel of the incomplete object. (i.e. pSphere2.rY) Hit copy and you are done. No more manually setting up millions of similar rig attributes and controls.
UPDATE Even better, here's a copy, paste keys script that should have been a Maya basic years ago... http://www.highend3d.com/maya/downloads/mel_scripts/animation/copyKey2-639.html COPY CHANNEL ATTRIBUTES SCRIPT Some of the smaller things that maya makes difficult are sometimes annoying. Here's a script that will copy all selected attribute channel values from object A to B. global string $gChannelBoxName; string $attrList[] = `channelBox -q -sma $gChannelBoxName`; string $sel[] = `ls -sl`; string $attr; for($attr in $attrList) { setAttr ($sel[0] + "." + $attr) `getAttr ($sel[1] + "." + $attr)`; } ;
Image
DECENT QUADRUPED RIG TUTORIAL CLICK HERE FOR TUT
Image
SNAPPING TRNS, ROT, SCALE, PIVOT FROM ONE OBJECT TO ANOTHER With 'snapMe' mel script one can easily do what should be a simple default tool in maya...matching one object's pivot to another. Just type in the setup for the script and it creates 4 hotkeys for you. Just select object 1, then object 2 - hit your hotkey and bamm, pivot is matched. (or trans/rot/scale depending on what you want. http://www.highend3d.com/maya/downloads/mel_scripts/modeling/misc/download-4757.html?loc=snapMe.rar
Image
USING THE MEGATK SHADER TO OUTPUT MULTIPLE PASSES IN 1 RENDER This is a fantastic universal shader that allows you to shade multiple attributes then output passes through a buffer writer. You have to assign the shader to all objects needed for passes, then assign a light shader to your lights and finally write out a buffer on a dummy object. The full documentation and tutorials are here... http://www.puppet.cgtalk.ru/shaders_p/docs/ p.s. Why didn't they implement output passes for the new mia shader!!! There is a mia_wrapper out there but you still have to hook it all through the ctrl.buffer shader. Fix render layers Autodesk!!!
Image
JOINT SELECTOR Here is a way to select joints via a control object when rigging a character: create a control object and parent it to the joint, freeze its transformations (the object not the joint) now select the objects shape node (not its transform node, below that) AND THEN the joint, and run the following mel... parent -r -s; now that joint has a shape node, selecting the shape will select the joint.
Image
MENTAL RAY MEMORY SETTINGS You must set the memory limit manually by turning off the Render Settings -> Batch Render -> Options -> Memory -> Auto Memory Limit. Then you can specify the memory limit manually. If you are rendering under Windows XP 64bit there is another issue with automatic memory which maxes out at the limit of the 32 bit version of the OS. - or - Either on the render Options or (when you use the commandline renderer with Render -r mr) by doing this: add this line to the mrRenderer.xml file in the Maya8.5/bin/rendererDesc/ directory (C:\Program Files\Autodesk\Maya8.5\bin\rendererDesc on Windows) Now you can specify the limit in the commandline: for example "C:\Program Files\Autodesk\Maya8.5\bin\Render.exe" -r mr -v 5 -jl 4000 "C:\Shared\maya\projects\myProject\scenes\myScene.m b" *TIP : Under MR globals/translation/performance you can check EXPORT OBJECTS ON DEMAND which apparently only loads objects if they are hit by a light ray. *TIP ...
Image
USING RAY TYPE SHADER TO EXCLUDE OBJECTS FROM RAY CALCULATIONS This shader can be assigned to surfaces to control reflection, refraction, light, shadow, environment, final gather, photon, custom. For example, to cast FG to a surface but have reflections from another surface... *On your IBL, turn off visible in reflections -assign a surface shader to your reflection poly sphere -set the transparency of the surface shader to 1 -assign to the "ray type" node to the color of the surface shader (you will find it under mental ray/ miscellaneous) -check "enable reflection" and "enable refraction" -set eye to black -assign a maya native envirnemnent map (or a reflection map) to the reflection and refraction slot. -don't forget to turn off the secondary reflection of the IBL and thank the mental ray guys for offering super mega amazing complexe hypertechnical plugthisandtwistthat long workarounds just to achieve a simple effect.
NOTES ABOUT MR GAMMA http://forums.cgsociety.org/showpost.php?p=4141325&postcount=37
Image
GREEBLE SCRIPT Greebling is a technique to procedurally generate boxy relief. For example, adding all kinds of panels to a spaceship or building the base for a city. One of these scripts for Maya is called Degreebler... http://deesine.grafikfel.org/DeeGreebler/index.html
Image
CAMERA SHADERS zDepthDOF Shader: http://homepage.mac.com/bauer/portfolio_shaders/zDepthDOF/zDepthDOF.html#Download Arpeture Lens Shader: http://www.lightengine3d.com/downloads/plugins/aperture/docs/aperture1.0_docs.html Lenscare post DOF AE plugin http://www.frischluft.com/lenscare/lenscare.php
Image
PHYSICAL SUN AND SKY WITH FG This will be a running journal of mental ray's new physical sun and sky in maya 8.5. In Maya 8.5 , go to your render settings and in the mental ray tab under environment you´ll find Physical Sun and Sky - hit create ( also make sure you enable FG ) * What happens when you hit the Create button? A directional light is created with a mia_physicalsun attached to it's mental ray light shader slot. This light will mimic the sun and yep, to the point where when you rotate the light the light will adjust to obey physical sunlight. Also, a mia_physicalsky is attached to the environment of your camera, simulating sky and atmosphere. Lastly a lens shader named mia_exposure_simple is connected to your camera. By default you´ll get a very accurate rendering of a daylight scene *To add clouds to your sky, plug a spherical environment map into the haze parameter of mia_physicalsky http://mentalraytips.blogspot.com/ *Sky Textures http://www.1000skies.com/ http...
Image
GLASS SHADING WITH L_GLASS SHADER Download this badboy mental ray shader from http://yashu.go.ro/ It is a modified Dialectric material more suited towards glass attributes. Cool frosted glass can be achieved as well. A good thread on the shader lies here... http://forums.cgsociety.org/showthread.php?f=87&t=334264&page=1&pp=15&highlight=lglass+shader ***Note: For transparent shadows, you need to hook a mib_shadow_transparency node into the MR shadow shader of the SG node of your Blinn. Set the mode to 1. ***To see your shadows through the glass hook a mib_light to the light shader slot of your lights. ***Video Tutorial http://www.deathfall.com/tutorials.php?op=showcontent&id=83&page=5 ***Tutorial http://deathfall.com/modules.php?op=modload&name=XForum&file=viewthread&tid=1654
Image
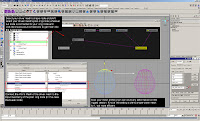
DRIVING A RIG'S DEFORMATION WITH A DRIVER MESH Here is a system that one might use if you have to tie clusters or other deformers to a rigged model. You duplicate off the model at the origin, plaster your deformers on it, and use them to drive the deformers/controllers on the rig. This way you dont need to worry about coordinates or deformation order. 1. Duplicate off the mesh at the origin 2. Select the shape node of the driver mesh through the outliner 3. Shift select the node on the driven mesh that the shape orig plugs into (tweak node) 4. Graph them in the hypergraph and get the connection editor up for those 2 nodes 5. Connect the worldmesh(0) of the driver mesh to the tweak node's inputgeometry node on the driven mesh 6. Add all of your deformers to the driver mesh Done
Image
POST BINDING JOINT MOVING AND MODEL CHANGING My Gawd, why I have just learned this and was not aware of it years ago? Never mind exporting skin weights, detaching, adjusting then re-importing weights. *Simply detach your skeleton with the 'keep history' option on, adjust, then re-bind. It keeps all of your rig's info. http://www.cronimation.com/rig.swf.html
Image
O.T. ADDING A HOTSPOT CLICK TO AN IMAGE Inserting a hyperlink into an image... Is the following html code into the body