CAMERA SHADERS zDepthDOF Shader: http://homepage.mac.com/bauer/portfolio_shaders/zDepthDOF/zDepthDOF.html#Download Arpeture Lens Shader: http://www.lightengine3d.com/downloads/plugins/aperture/docs/aperture1.0_docs.html Lenscare post DOF AE plugin http://www.frischluft.com/lenscare/lenscare.php
Posts
Showing posts from May, 2007
- Get link
- X
- Other Apps
PHYSICAL SUN AND SKY WITH FG This will be a running journal of mental ray's new physical sun and sky in maya 8.5. In Maya 8.5 , go to your render settings and in the mental ray tab under environment you´ll find Physical Sun and Sky - hit create ( also make sure you enable FG ) * What happens when you hit the Create button? A directional light is created with a mia_physicalsun attached to it's mental ray light shader slot. This light will mimic the sun and yep, to the point where when you rotate the light the light will adjust to obey physical sunlight. Also, a mia_physicalsky is attached to the environment of your camera, simulating sky and atmosphere. Lastly a lens shader named mia_exposure_simple is connected to your camera. By default you´ll get a very accurate rendering of a daylight scene *To add clouds to your sky, plug a spherical environment map into the haze parameter of mia_physicalsky http://mentalraytips.blogspot.com/ *Sky Textures http://www.1000skies.com/ http...
- Get link
- X
- Other Apps
GLASS SHADING WITH L_GLASS SHADER Download this badboy mental ray shader from http://yashu.go.ro/ It is a modified Dialectric material more suited towards glass attributes. Cool frosted glass can be achieved as well. A good thread on the shader lies here... http://forums.cgsociety.org/showthread.php?f=87&t=334264&page=1&pp=15&highlight=lglass+shader ***Note: For transparent shadows, you need to hook a mib_shadow_transparency node into the MR shadow shader of the SG node of your Blinn. Set the mode to 1. ***To see your shadows through the glass hook a mib_light to the light shader slot of your lights. ***Video Tutorial http://www.deathfall.com/tutorials.php?op=showcontent&id=83&page=5 ***Tutorial http://deathfall.com/modules.php?op=modload&name=XForum&file=viewthread&tid=1654
- Get link
- X
- Other Apps

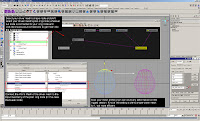
DRIVING A RIG'S DEFORMATION WITH A DRIVER MESH Here is a system that one might use if you have to tie clusters or other deformers to a rigged model. You duplicate off the model at the origin, plaster your deformers on it, and use them to drive the deformers/controllers on the rig. This way you dont need to worry about coordinates or deformation order. 1. Duplicate off the mesh at the origin 2. Select the shape node of the driver mesh through the outliner 3. Shift select the node on the driven mesh that the shape orig plugs into (tweak node) 4. Graph them in the hypergraph and get the connection editor up for those 2 nodes 5. Connect the worldmesh(0) of the driver mesh to the tweak node's inputgeometry node on the driven mesh 6. Add all of your deformers to the driver mesh Done
- Get link
- X
- Other Apps

POST BINDING JOINT MOVING AND MODEL CHANGING My Gawd, why I have just learned this and was not aware of it years ago? Never mind exporting skin weights, detaching, adjusting then re-importing weights. *Simply detach your skeleton with the 'keep history' option on, adjust, then re-bind. It keeps all of your rig's info. http://www.cronimation.com/rig.swf.html
- Get link
- X
- Other Apps

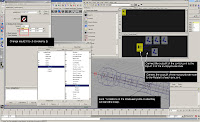
3 BONE BICEP SETUP FOR TWIST MINIMIZING Here is an arm setup which uses a control joint to drive 3 joints from the shoulder to the elbow using a multiply/divide node. This will lock the shoulder twisting and disperse it through the bicep. 1. Select joints you wish to link the roll (x) to - shoulderControlJoint, bicepJointA and bicepJointB 2. Open the hypershade 3. Click on the "show upstream and downstream connections" icon to show the shoulderControlJoint bicepJointA and bicepJointB in the hypershade. 4. Create a "multiply Divide" node (Create>General Utilities>Multiply Divide ) 5. Change "input2 X" on the multiply/Divide from 1 to .5 (since we are halving and the node is set to multiply) 6. Now middle click drag and connect the "Rotate X" of the shoulderControlJoint to the "Input1 X" of the multiply/Divide node. (This is the value that is going to be halved.) 7. Connect the "Output X" of the multiplyDivide to the ...
- Get link
- X
- Other Apps
MIX8LAYER SHADER A really cool layering shader that can be used to layer just about anything in Maya. Brilliant. 1. Drop down a Mix8 2. Assign it to Geo. 3. Base color should be a shader 4. Add in your layers *To add a bumpcombiner to a mix8, connect these 2 nodes Mix8layer.Outvalue -----> bumpCombiner1.m_input Mix8layer.OutvalueA -----> bumpCombiner1A.m_input
- Get link
- X
- Other Apps

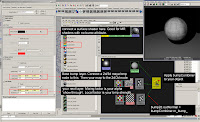
LAYERED BUMP MAPS USING BUMP COMBINER Download bumpCombiner for mental ray at... http://www.highend3d.com/maya/downloads/shaders/2996.html 1. Open hypershade and create a bumpcombiner (bc) node 2. Assign it to the sphere. 3. Open the attribute editor for the bc. 4. Click the enable bump check box in the bump .surface section 5. Assign a material to the the ::surface.shader above (any maya material will work phong, lambert...) 6. map a maya 2dbump node to the ::bump.base 7. map a bulge texture to the bump value of the 2dbump node. 8. render with mr.
- Get link
- X
- Other Apps
MAYA TRIX Welcome to My Maya trix blog. Quite often I find myself needing to re-teach myself certain techniques and wasting a lot of time doing so. To put it simple, working in commercials, TV and film visual effects one can absorb a tonne of technical information. This will be a database of Maya techniques that I come across and catalogue for future use. Sometimes efficiency is key and you don't want to re-learn techniques when the time comes to use them. This is a quick access library for myself. If you can use any of it, go right ahead. Adidas Shoes

