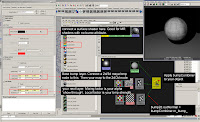

LAYERED BUMP MAPS USING BUMP COMBINER
Download bumpCombiner for mental ray at...
http://www.highend3d.com/maya/downloads/shaders/2996.html
1. Open hypershade and create a bumpcombiner (bc) node
2. Assign it to the sphere.
3. Open the attribute editor for the bc.
4. Click the enable bump check box in the bump.surface section
5. Assign a material to the the ::surface.shader above (any maya material will work phong, lambert...)
6. map a maya 2dbump node to the ::bump.base
7. map a bulge texture to the bump value of the 2dbump node.
8. render with mr.
Comments